
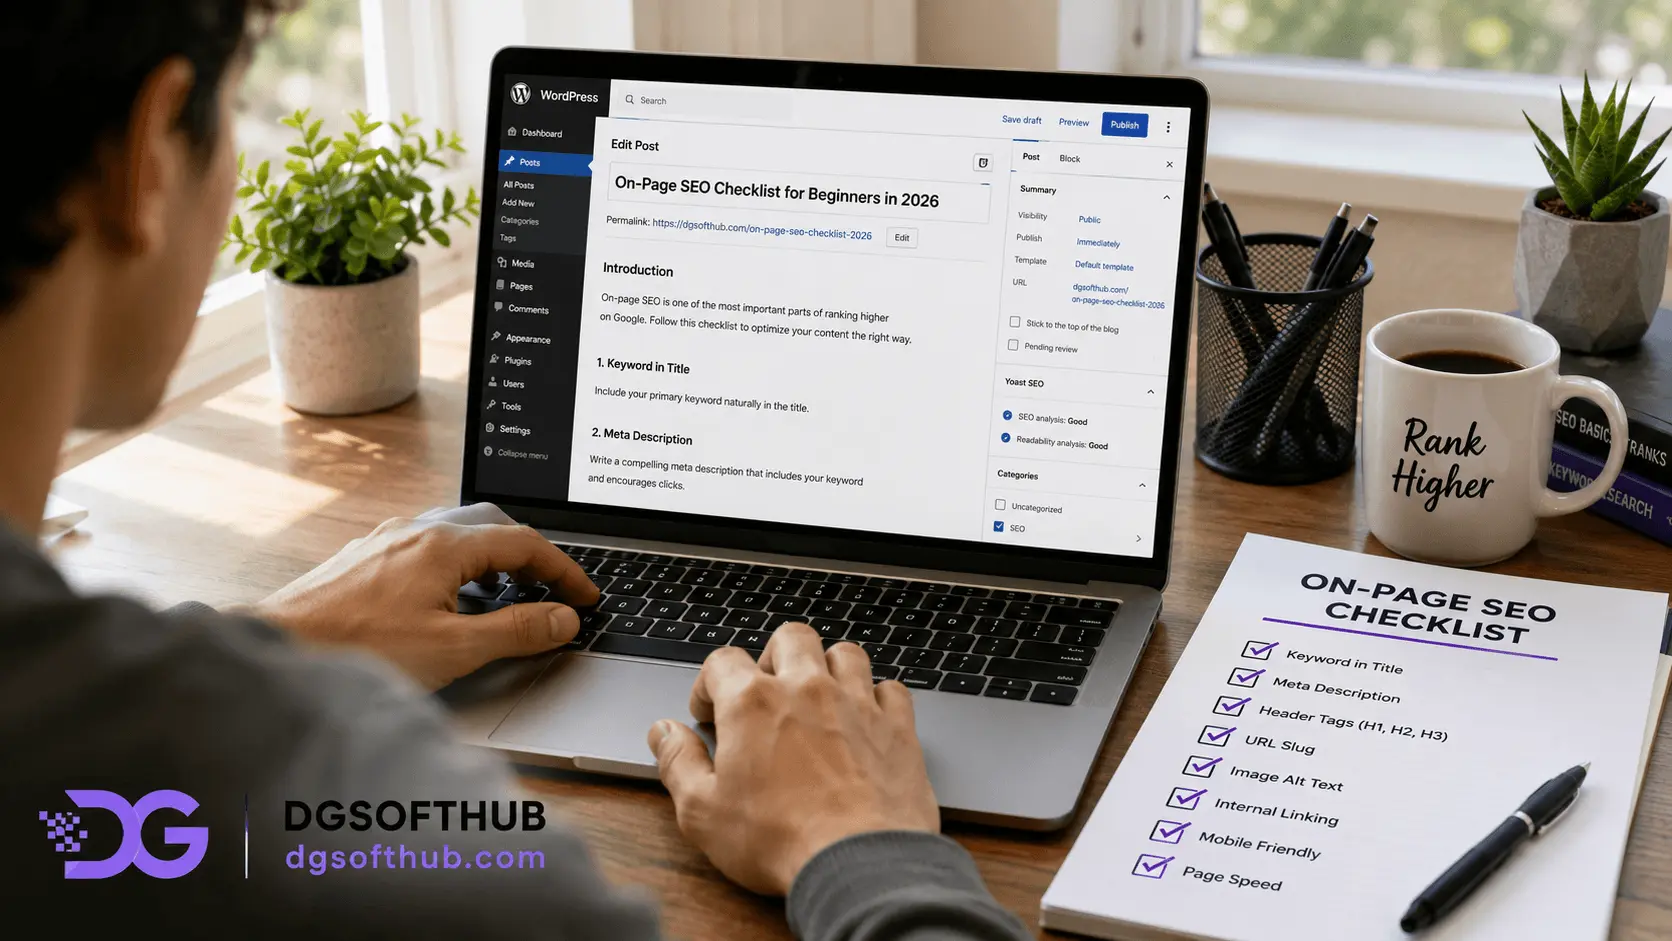
Updated: August:2026
You wrote the post. You hit publish. And then… nothing. No traffic, no clicks, no rankings. Sound familiar? learn for on-page SEO.
Most beginners assume the problem is their content. It usually isn’t. The problem is everything around the content — the stuff Google looks at before it even reads your words. That’s what on-page SEO fixes, and this checklist covers every single step.
Why On-Page SEO Is the First Thing You Should Fix
Before spending hours on backlinks or social media, get your on-page SEO right. It’s the foundation everything else sits on.
Here’s the simple version: on-page SEO is how you tell Google what your page is about, who it’s for, and why it deserves to rank. Without it, even genuinely useful content gets buried on page 4 where nobody ever scrolls.
The good news? Most of it is free. Most of it takes under 30 minutes per post. And most beginners skip huge chunks of it — which means doing it properly gives you a real edge.
The Complete On-Page SEO Checklist for Beginners
1. Choose One Focus Keyword Before You Write Anything
This is where most beginners go wrong before they’ve even typed a word. They write first and think about keywords later. By then it’s too late to structure the post properly.
Pick one primary keyword before you start. Use a free tool like Ubersuggest or Google Keyword Planner. Look for keywords with decent search volume — at least 500 searches per month — and low to medium difficulty, ideally under 40 for a newer site.
One keyword. Not five. Not a keyword and three variations. One clear target. Everything else in this checklist flows from that decision.
2. Put the Keyword in the Right Places
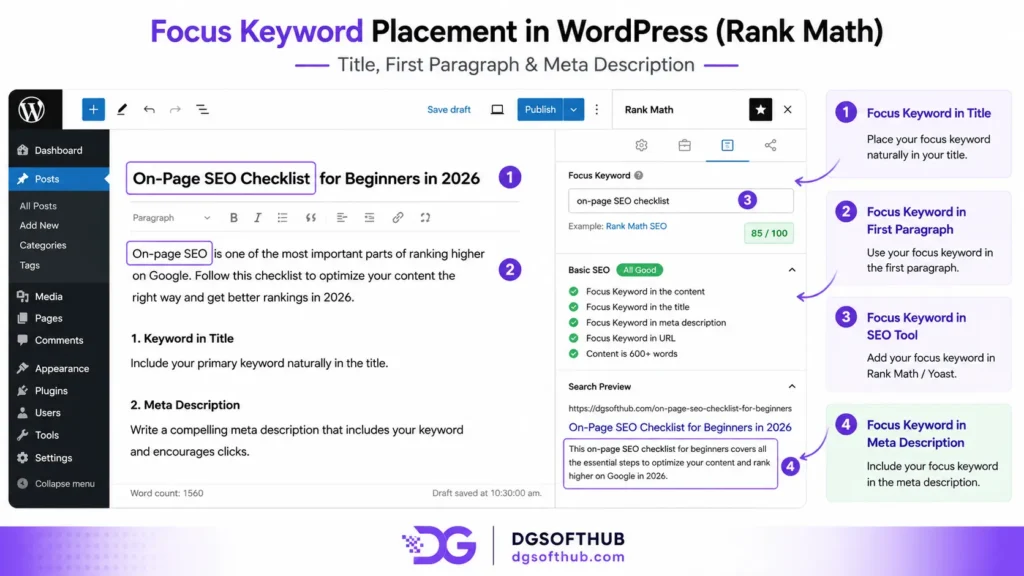
Once you have your focus keyword, place it in these specific spots:
- The SEO title — ideally in the first 3–4 words. Google reads left to right, and so do your readers.
- The first 100 words of the post — not crammed in awkwardly, but naturally.
- At least one H2 heading — Google pays attention to headings.
- The meta description — more on this below.
- One image alt text — include it once, not everywhere.
Don’t obsess over keyword density. If you’re writing naturally about your topic, the keyword will appear where it should. Stuffing it in every paragraph does more harm than good.
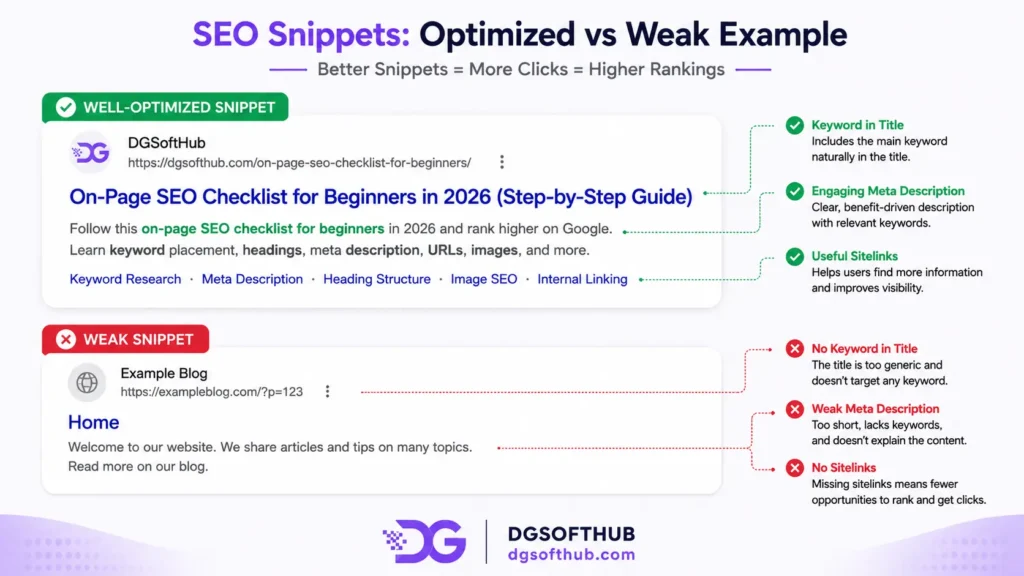
3. Write an SEO Title That Actually Gets Clicked
Your SEO title has two jobs: tell Google what the page is about, and convince a real person to click it over the other nine results on the page.
Most beginners nail the first job and completely fail the second. A title like “On-Page SEO Guide” is accurate. It’s also boring. Nobody clicks boring.
Try these instead: add a number (“15-Point On-Page SEO Checklist”), add a year (“On-Page SEO Checklist for Beginners (2026 Edition)”), or add a clear benefit. Keep it under 60 characters or Google cuts it off mid-sentence.
4. Write a Meta Description That Works Like an Ad
The meta description doesn’t directly affect your ranking. But it affects whether anyone clicks your result — and click-through rate absolutely affects your ranking over time.
Think of your meta description as a two-sentence ad for your post. Include your keyword, hint at the benefit, and end with a soft call to action.
❌ “This post covers on-page SEO. Learn about titles, keywords, and more.” ✅ “Struggling to rank on Google? This on-page SEO checklist for beginners walks you through every optimization step — free, practical, and beginner-friendly.”
Keep it between 150–160 characters. Any longer and Google cuts it off.
5. Clean Up Your URL Slug
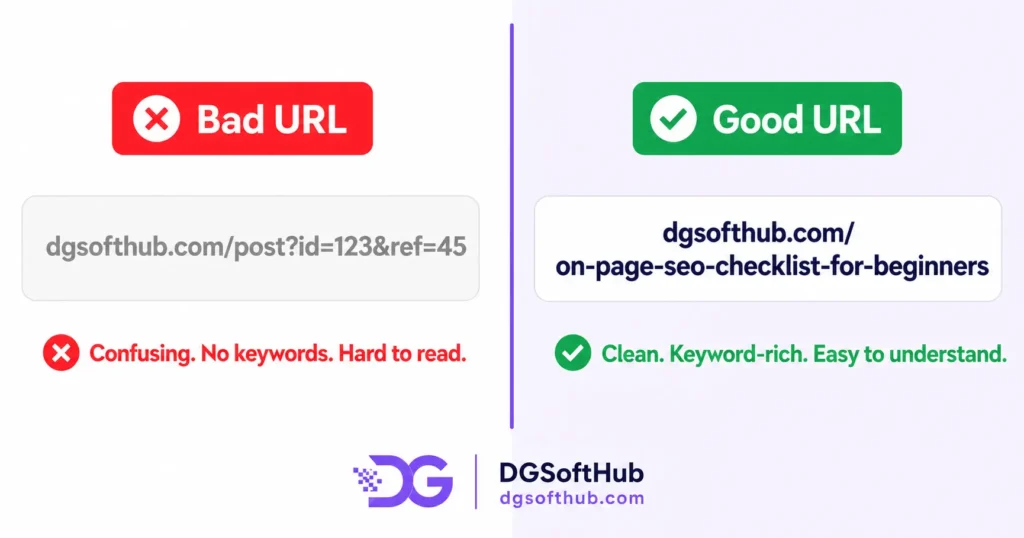
This one takes 10 seconds and most beginners never do it. WordPress auto-generates a URL from your post title. If your title is long, your URL becomes a mess.
Clean it up to something like: yoursite.com/on-page-seo-checklist-for-beginners
Short, keyword-first, no dates. Dates in URLs are a trap — when you update the post next year, the URL looks outdated and you either keep a misleading slug or break all your existing links.
6. Structure Your Headings Properly
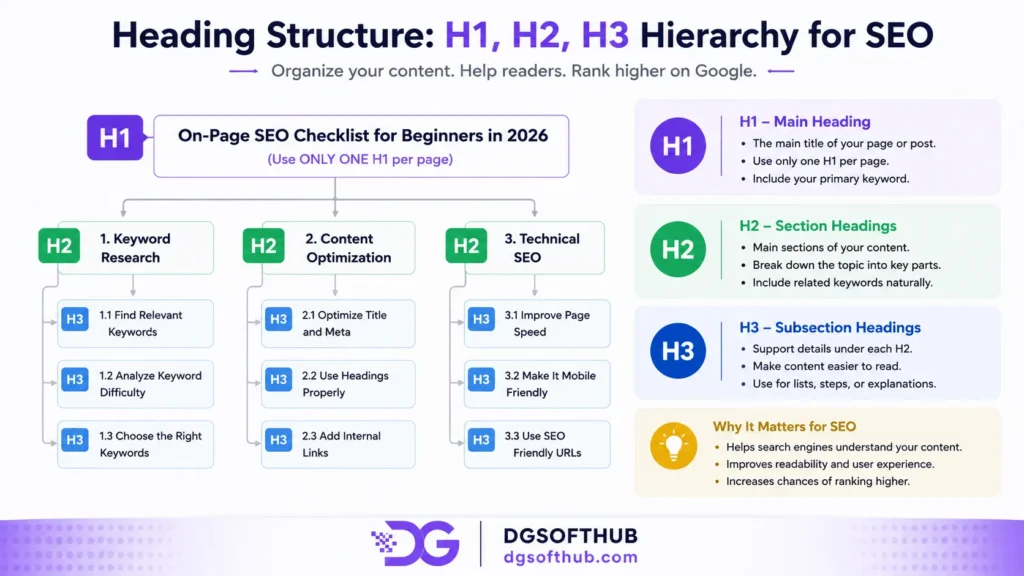
Headings are not just for design. They’re how Google understands the structure and hierarchy of your content.
One H1 per page — that’s your post title. WordPress handles this automatically. H2s are your main sections. Think of them as chapters. H3s sit inside H2 sections when you need to break something down further.
Most beginners either use no headings at all (walls of text) or use them randomly for visual variety. Neither helps Google or your readers.
7. Write Content That Actually Answers the Question
This sounds obvious. It isn’t. Google’s job is to give searchers the best answer to their query. Your job is to be that answer.
If someone searches “on-page SEO checklist for beginners” and lands on your post, they should leave with everything they need — not a surface-level overview that sends them back to Google for details.
In practice, what this looks like is: cover the topic completely, use specific examples, and don’t pad the word count with filler. I’ve seen beginners write 3,000-word posts that say almost nothing because every paragraph repeats the same vague point. Length without substance doesn’t rank. Depth does.
8. Add Internal Links to Your Other Posts
Internal linking is one of the most underused SEO tactics for beginners. It’s free, it takes two minutes per post, and it does three important things:
- Keeps readers on your site longer — which signals to Google that your content is useful.
- Passes authority between your pages — when one post ranks well, internal links spread some of that ranking power.
- Helps Google discover and index your newer content faster.
Aim for 2–4 internal links per post minimum. Use descriptive anchor text — not “click here” but “on-page SEO checklist” or “keyword research guide.”
9. Add at Least One External Link to a Credible Source
This one surprises beginners. Why link away from your own site? Because it builds credibility. Citing a credible source — Google’s own Search Central documentation, a study from Ahrefs, an industry report — tells Google your content is well-researched.
One or two external links per post is enough. Link to authoritative sources, not competitor blogs.
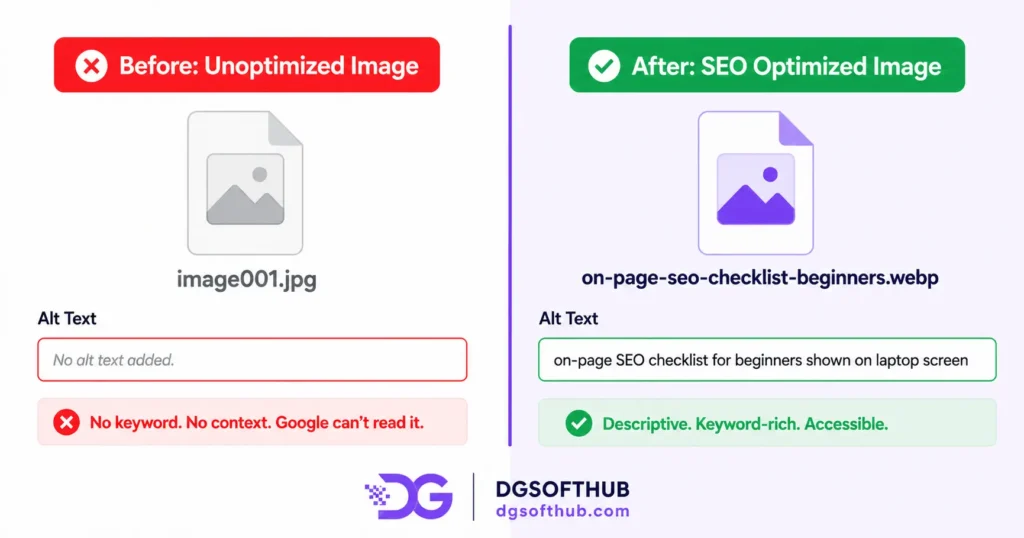
10. Optimize Every Image Before You Upload
Images are one of the biggest missed SEO opportunities for beginners. Most people just drag a photo in and move on. Here’s what you should actually do:
- Rename the file before uploading. “screenshot_2024_final_v3.png” means nothing. “on-page-seo-checklist-wordpress.webp” tells Google exactly what the image shows.
- Convert to WebP format. WebP files are significantly smaller than JPG or PNG with no visible quality loss. Smaller files load faster.
- Compress before uploading. Run every image through TinyPNG or Squoosh. Keep images under 100KB where possible.
- Write descriptive alt text. Include your keyword naturally in one image’s alt text — not all of them.
11. Improve Your Page Speed
Page speed is a confirmed Google ranking factor. A page that takes 5 seconds to load loses a significant portion of its visitors before they’ve read a single word.
The biggest culprits: uncompressed images, too many plugins, and a heavy theme. Free fixes that actually work: use a caching plugin (W3 Total Cache is free and effective), use a lightweight theme like GeneratePress or Astra, and check your score using Google PageSpeed Insights — it’s free and tells you exactly what’s slowing your site down.
12. Make Sure Your Post Is Mobile-Friendly
Over 60% of Google searches happen on mobile. If your post looks broken on a phone screen, Google knows — and it affects your ranking.
Most modern WordPress themes are responsive by default. But check anyway. Open your post on your phone after publishing. Is the font readable? Do images fit the screen? If anything looks off, fix it before you promote the post anywhere.
13. Use an SEO Plugin and Fill Every Field
If you’re on WordPress, install either Yoast SEO or RankMath — both have strong free versions. These plugins add a panel below your post editor where you can fill in your focus keyword, SEO title, meta description, and social sharing image.
Most beginners install the plugin and then ignore the panel. That defeats the entire purpose. Fill in every field for every post before you hit publish. It takes 3 minutes and directly improves how your post appears in search results.
14. Check Readability Before Publishing
Google’s helpful content system rewards content that’s easy to read and genuinely useful. Aim for a Flesch Reading Ease score of 65–80.
- Break up long paragraphs — no block should be longer than 4–5 lines on screen.
- Use short sentences regularly — vary between short punchy statements and longer explanatory ones.
- Avoid jargon where plain language works.
Grammarly’s free browser extension catches the basics. Hemingway Editor (free online) highlights complex sentences and passive voice.
15. Update Old Posts Regularly
This is the part nobody talks about — and it’s where a lot of easy ranking wins live. Google doesn’t just rank new content. It rewards content that stays current and accurate.
Once a quarter, go through your 5–10 most important posts. Update any stats, add new information, refresh examples. Change the published date to reflect the update. Then request re-indexing in Google Search Console.
This takes less time than writing a new post and often produces faster results.
Common On-Page SEO Mistakes Beginners Make
- Targeting keywords that are too competitive. A brand new blog cannot rank for “SEO tips.” Start with long-tail, low-competition keywords and build from there.
- Keyword stuffing. Forcing your keyword into every paragraph makes content unreadable and triggers Google’s spam filters. Natural usage only.
- Skipping the meta description. When you don’t write one, Google pulls random text from your post — often a sentence that makes no sense out of context. Always write your own.
- Publishing and forgetting. SEO is not a one-time task. The blogs that rank consistently are the ones that get maintained.
More Useful Contents Relates to topic
- Best Freelancing Platforms for Beginners in 2026
- How to Write SEO-Friendly Blog Posts (Complete Guide)
- Best Free Tools for Digital Marketing Beginners
- Free AI Tools Every Beginner Digital Marketer Should Use in 2026
Download Free Checklist → On-Page SEO Checklist PDF
Frequently Asked Questions
How long does on-page SEO take to show results?
Typically 4–12 weeks for a new post on a newer site. On-page SEO is not instant — it’s an investment that compounds over time.
Do I need to do on-page SEO for every blog post?
Yes, every single one. With a good SEO plugin and this checklist, you can complete on-page optimization in under 20 minutes per post.
Is on-page SEO more important than backlinks?
For beginners, yes. There’s no point building backlinks to a poorly optimized page. Get your on-page right first, then work on off-page authority.
Can I do on-page SEO without a paid tool?
Absolutely. Yoast SEO free, RankMath free, Ubersuggest free, Google Search Console free, Google PageSpeed Insights free. You don’t need to spend a rupee to implement everything in this checklist.
What’s the single most important on-page SEO factor?
Your title tag. It’s what Google and users see first. A well-written, keyword-rich title that earns clicks is the highest-leverage change you can make on any page.
How often should I update old blog posts for SEO?
Aim to review your top 10 posts every three to four months. Even small updates signal to Google that your content is maintained.
Does page speed really affect rankings that much?
Yes — especially on mobile. Google uses Core Web Vitals as a ranking signal, and page speed is central to that.
What You Should Do Next
Don’t try to apply all 15 points to every post at once — you’ll get overwhelmed and do none of them properly. Here’s the order that actually makes sense:
- Open your most important existing post — the one you most want to rank. Run through checklist items 1 through 6 first: keyword placement, title, meta description, URL slug, headings, and content quality.
- Fix the images. Rename, compress, convert to WebP, add alt text. This alone can noticeably improve page speed.
- Install RankMath or Yoast if you haven’t already. Fill in every field in the SEO panel for that post.
- Check the post on your phone. Fix anything that looks broken on mobile.
- Submit the URL in Google Search Console → URL Inspection → Request Indexing.
- Then move to your next most important post and repeat. Don’t try to optimize 20 posts this week. Do two properly. That’s always better than doing twenty halfway.
P.S. Whenever you’re ready, here are two ways I can help you build your online business:
Get the Free Starter Kit: Grab our Pre-Publish and Monthly Review Checklists to keep your workflow on track.
Get the 30-Day Roadmap: Download the Start a Blog That Earns eBook to get our exact, structured framework for turning content into a profitable digital asset.
About the Author
Muhammad Arif Hussain
Hi, I’m Muhammad Arif Hussain, a digital marketer, SEO strategist, and the creator of DGSoftHub. I started this blog with a simple mission: to make online growth accessible to everyone. Whether you are trying to rank your first blog post, optimize your website’s technical performance, or land your first client on freelancing platforms like Fiverr, I provide the practical tools and straight-to-the-point strategies you need to build a profitable digital presence with zero fluff.
Published on DGSoftHub.com | Practical guides on SEO, Digital Marketing, AI Tools & More.